

Looking for the final word chocolate cheesecake expertise? Look no additional! We’ve gathered 33 irresistible recipes that rework basic cheesecake into pure chocolate decadence. From wealthy New York-style creations to no-bake wonders and inventive taste twists, these desserts promise to fulfill your deepest chocolate cravings. Get prepared to uncover your new favourite indulgence—your candy tooth will thanks!
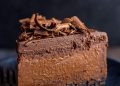
Classic Chocolate Cheesecake
Baking a basic chocolate cheesecake looks like wrapping your self in a heat blanket—it’s wealthy, comforting, and all the time a crowd-pleaser. You’ll love how the chocolatey crust pairs with that velvety filling, and actually, it’s simpler to make than you would possibly suppose. Let’s get started!
Ingredients
- 1 ½ cups chocolate wafer crumbs (I seize store-bought to save time, however home made works too)
- ¼ cup granulated sugar
- 6 tbsp unsalted butter, melted (salted butter is ok, however I want controlling the salt myself)
- 24 oz cream cheese, at room temp (that is key for a {smooth}, lump-free batter)
- 1 cup granulated sugar
- 3 giant eggs, at room temp (chilly eggs could make the filling separate)
- 1 cup semi-sweet chocolate chips, melted and barely cooled
- 1 tsp vanilla extract
- ½ cup bitter cream (full-fat offers the creamiest texture)
- ¼ cup heavy cream
Instructions
- Preheat your oven to 325°F and grease a 9-inch springform pan.
- In a medium bowl, combine the chocolate wafer crumbs, ¼ cup sugar, and melted butter till the crumbs are evenly coated.
- Press the crumb combination firmly into the underside of the ready pan, utilizing the again of a spoon to create a fair layer.
- Bake the crust for 10 minutes at 325°F, then take away it and let it cool fully on a wire rack.
- In a big bowl, beat the room temperature cream cheese and 1 cup sugar on medium pace till fully {smooth} and no lumps stay, about 2-3 minutes.
- Add the room temperature eggs one after the other, beating for 20 seconds after every addition till simply included.
- Pour within the melted semi-sweet chocolate, vanilla extract, bitter cream, and heavy cream, then combine on low pace till the batter is uniform and shiny.
- Tip: Scrape down the edges of the bowl with a spatula midway via mixing to guarantee the whole lot is mixed evenly.
- Pour the filling over the cooled crust and {smooth} the highest with a spatula.
- Place the springform pan on a baking sheet and bake at 325°F for 55-65 minutes, till the sides are set however the middle nonetheless jiggles barely when gently shaken.
- Tip: Avoid opening the oven door in the course of the first 45 minutes of baking to stop cracks from forming.
- Turn off the oven, crack the door open about 1 inch, and let the cheesecake cool inside for 1 hour to stop sudden temperature modifications.
- Remove the cheesecake from the oven and run a skinny knife across the fringe of the pan to loosen it from the edges.
- Tip: This helps stop the floor from cracking because it continues to cool and contract.
- Let the cheesecake cool fully at room temperature for two hours, then refrigerate uncovered for not less than 6 hours or in a single day earlier than serving.
Rich and fudgy with a silky-smooth texture, this cheesecake is pure indulgence. I really like serving it chilled with a drizzle of salted caramel or contemporary raspberries to steadiness the sweetness. It’s the type of dessert that makes any event really feel particular.
Raspberry Swirl Chocolate Cheesecake

Just think about a dessert that mixes wealthy chocolate and tangy raspberry within the creamiest cheesecake you’ve ever tasted. You’re going to love how the sweet-tart swirl cuts via the decadent chocolate base. This is the type of showstopper that makes any event really feel particular.
Ingredients
- 2 cups chocolate graham cracker crumbs (I like the additional chocolatey ones)
- 1/2 cup melted unsalted butter (the salted form could make it too salty)
- 24 oz cream cheese, at room temperature for {smooth} mixing
- 1 cup granulated sugar
- 1 cup bitter cream
- 3 giant eggs, room temperature helps stop cracking
- 1 tsp vanilla extract
- 1/2 cup cocoa powder
- 1/2 cup raspberry preserves (seedless offers the prettiest swirl)
Instructions
- Preheat your oven to 325°F.
- Combine chocolate graham cracker crumbs with melted butter in a medium bowl.
- Press the crumb combination firmly into the underside of a 9-inch springform pan.
- Bake the crust for 10 minutes till barely firm.
- Beat room temperature cream cheese with granulated sugar till fully {smooth}.
- Mix in bitter cream and vanilla extract till effectively mixed.
- Add eggs one after the other, mixing simply till included after every addition.
- Divide the batter evenly between two bowls.
- Whisk cocoa powder into one bowl of batter till no streaks stay.
- Pour the chocolate batter over the ready crust.
- Drop spoonfuls of plain batter over the chocolate layer.
- Dollop raspberry preserves randomly excessive.
- Use a knife to gently swirl the preserves via the batters.
- Place the springform pan in a bigger baking dish.
- Pour scorching water into the bigger dish till it reaches midway up the springform pan.
- Bake for 60-70 minutes till the sides are set however the middle nonetheless jiggles barely.
- Turn off the oven and crack the door open barely.
- Let the cheesecake cool within the oven for 1 hour.
- Remove from oven and run a knife across the edge to stop sticking.
- Refrigerate for not less than 4 hours, ideally in a single day.
Unbelievably creamy with that excellent distinction between wealthy chocolate and vivid raspberry swirls. The water tub methodology offers you that professional-quality texture with none cracks. Try serving skinny slices with contemporary raspberries and a dusting of powdered sugar for an additional particular presentation.
Nutella Chocolate Cheesecake Bars

Remember that point you wished one thing decadent however didn’t need to fuss with an entire cheesecake? These Nutella chocolate cheesecake bars are your new finest pal—they ship all that wealthy, creamy goodness in a no-fuss bar type that’s excellent for sharing (or not). You get a fudgy chocolate base, a silky Nutella-swirled filling, and that signature cheesecake tang in each chunk.
Ingredients
- 1 ½ cups chocolate wafer crumbs (I just like the slight bitterness to steadiness the candy filling)
- 6 tbsp unsalted butter, melted (salted works too if that’s what you’ve gotten useful)
- 16 oz cream cheese, at room temperature for {smooth} mixing
- ½ cup granulated sugar
- 2 giant eggs, at room temperature to stop curdling
- 1 tsp pure vanilla extract
- ½ cup Nutella, barely warmed for simpler swirling
Instructions
- Preheat your oven to 350°F and line an 8×8 inch baking pan with parchment paper, leaving some overhang for simple elimination.
- In a medium bowl, mix the chocolate wafer crumbs and melted butter till the combination resembles moist sand.
- Press the crumb combination firmly into the underside of the ready pan utilizing the underside of a measuring cup to create a fair layer.
- Bake the crust for 8 minutes till barely firm, then let it cool on a wire rack when you make the filling.
- In a big bowl, beat the room temperature cream cheese and granulated sugar with an electrical mixer on medium pace for two minutes till fully {smooth} and no lumps stay.
- Add the room temperature eggs one after the other, beating for 30 seconds after every addition till absolutely included.
- Mix within the vanilla extract simply till mixed, being cautious not to overmix as soon as the eggs are in.
- Pour the cream cheese filling over the cooled crust and unfold it evenly with a spatula.
- Drop spoonfuls of the warmed Nutella randomly over the filling, then use a knife to gently swirl it via the batter in a figure-8 sample.
- Bake for 25-Half-hour till the sides are set however the middle nonetheless has a slight jiggle whenever you gently shake the pan.
- Turn off the oven, crack the door open, and let the bars cool inside for 1 hour to stop cracking.
- Transfer the pan to the fridge and chill for not less than 4 hours, or in a single day for the very best texture.
- Use the parchment paper overhang to carry the bars from the pan, then minimize into 9 squares with a pointy knife cleaned between cuts.
Seriously, the feel is pure magic—creamy and dense like correct cheesecake however with these beautiful Nutella ribbons running via. I really like serving these barely chilled with a dusting of cocoa powder, or you would go all out and add a dollop of whipped cream and contemporary berries for a flowery dessert platter.
Triple Chocolate Cheesecake

Picture this: you’re craving one thing decadent, one thing that mixes creamy cheesecake with wealthy chocolate in not one, not two, however three superb methods. This triple chocolate cheesecake is that dream dessert come to life, excellent for impressing company or treating your self after a protracted week.
Ingredients
- 1 ½ cups chocolate cookie crumbs (I all the time use Oreo crumbs with the filling eliminated for optimum chocolate taste)
- ¼ cup granulated sugar
- 6 tbsp unsalted butter, melted (salted works too if that’s what you’ve gotten readily available)
- 24 oz cream cheese, softened to room temperature (that is essential for a {smooth} filling)
- 1 cup granulated sugar
- 3 giant eggs, at room temperature (chilly eggs may cause cracking)
- 1 cup bitter cream
- 1 tsp vanilla extract
- ½ cup semi-sweet chocolate chips, melted and barely cooled
- ½ cup milk chocolate chips, melted and barely cooled
- ½ cup white chocolate chips, melted and barely cooled
Instructions
- Preheat your oven to 325°F and grease a 9-inch springform pan.
- Combine chocolate cookie crumbs, ¼ cup sugar, and melted butter in a medium bowl till the combination resembles moist sand.
- Press the crumb combination firmly into the underside of the ready pan utilizing the underside of a measuring cup to create a fair layer.
- Bake the crust for 10 minutes at 325°F till calmly set, then take away from oven and let cool when you put together the filling.
- In a big bowl, beat the softened cream cheese and 1 cup sugar with an electrical mixer on medium pace for 3 minutes till fully {smooth} and lump-free.
- Add eggs one after the other, beating for 30 seconds after every addition till absolutely included.
- Mix in bitter cream and vanilla extract till simply mixed, being cautious not to overmix.
- Divide the cheesecake batter evenly into three separate bowls.
- Stir the melted semi-sweet chocolate into the primary bowl of batter till absolutely included.
- Stir the melted milk chocolate into the second bowl of batter till uniform in colour.
- Stir the melted white chocolate into the third bowl of batter till fully blended.
- Drop giant spoonfuls of every chocolate batter randomly over the cooled crust, making a marbled sample.
- Use a knife to gently swirl the batters collectively, making 4-5 passes via the pan with out overmixing.
- Place the springform pan into a bigger baking dish and create a water tub by pouring scorching water into the outer dish till it reaches midway up the edges of the springform pan.
- Bake at 325°F for 60-70 minutes till the sides are set however the middle nonetheless jiggles barely when gently shaken.
- Turn off the oven, crack the door open about 1 inch, and let the cheesecake cool within the oven for 1 hour to stop cracking.
- Remove from oven and run a knife across the fringe of the pan to loosen the cheesecake from the edges.
- Refrigerate for not less than 6 hours, or ideally in a single day, earlier than serving.
Getting that first slice reveals lovely chocolate swirls all through the creamy filling. The texture is extremely {smooth} and wealthy, with every chocolate selection shining via in each chunk. Try serving skinny slices with contemporary raspberries or a drizzle of caramel sauce for an additional particular presentation.
No-Bake Fudge Chocolate Cheesecake

Just whenever you suppose cheesecake can’t get any simpler, this no-bake model comes alongside and modifications the whole lot. You get that wealthy, creamy texture with out ever turning in your oven—excellent for whenever you’re craving one thing decadent however don’t need to warmth up the kitchen. Seriously, this fudge chocolate model would possibly simply grow to be your new go-to dessert.
Ingredients
- 2 cups chocolate cookie crumbs (I all the time use Oreo crumbs with the filling eliminated for that further chocolate punch)
- 1/2 cup melted unsalted butter (go for the good things—it actually makes the crust shine)
- 16 oz cream cheese, softened (take it out about Half-hour earlier than—room temp cream cheese blends a lot smoother)
- 1 cup powdered sugar (sift it first to keep away from these pesky lumps)
- 1/2 cup cocoa powder (I want Dutch-processed for that deep chocolate taste)
- 1 tsp vanilla extract (the actual stuff makes all of the distinction right here)
- 1 cup heavy whipping cream (chill your bowl and beaters first for finest outcomes)
- 1 cup semi-sweet chocolate chips (soften these slowly—persistence pays off with silky chocolate)
Instructions
- Combine 2 cups chocolate cookie crumbs with 1/2 cup melted butter in a medium bowl till the combination resembles moist sand.
- Press the crumb combination firmly into the underside of a 9-inch springform pan, utilizing the underside of a measuring cup to create a fair layer.
- Chill the crust within the fridge for precisely quarter-hour when you put together the filling—this helps it set correctly.
- Beat 16 oz softened cream cheese with an electrical mixer on medium pace for two minutes till fully {smooth} and lump-free.
- Gradually add 1 cup sifted powdered sugar whereas mixing on low pace to stop a sugar cloud in your kitchen.
- Sift in 1/2 cup cocoa powder and add 1 tsp vanilla extract, then combine on medium till absolutely included and the combination is uniform in colour.
- In a separate chilled bowl, whip 1 cup heavy cream on high pace till stiff peaks type, about 3-4 minutes—don’t over-whip or it’ll grow to be buttery.
- Gently fold the whipped cream into the chocolate cream cheese combination utilizing a spatula, ensuring to scrape the underside and sides of the bowl.
- Melt 1 cup chocolate chips in a double boiler over simmering water, stirring always till fully {smooth} and shiny, about 4-5 minutes.
- Fold the melted chocolate into the cheesecake filling till no white streaks stay, working rapidly earlier than the chocolate sets.
- Pour the filling over the chilled crust and {smooth} the highest with an offset spatula for that skilled bakery look.
- Refrigerate the cheesecake for not less than 6 hours, or ideally in a single day, till fully set and firm to the contact.
But this cheesecake delivers essentially the most unimaginable fudgy texture that melts in your mouth with each chunk. The chocolate depth builds from the cookie crust via the creamy filling, creating layers of chocolate goodness. Try serving it with contemporary raspberries or a drizzle of caramel sauce for that excellent sweet-tangy distinction that’ll have everybody asking for seconds.
Chocolate Espresso Cheesecake

Ugh, who doesn’t love that magical combo of chocolate and low? You’re about to make the creamiest, most decadent chocolate espresso cheesecake that’ll have everybody begging to your recipe. Seriously, that is the dessert that makes you seem like a professional baker with minimal effort.
Ingredients
– 2 cups graham cracker crumbs (I just like the honey form for further taste)
– 1/2 cup melted unsalted butter (go for the good things – it makes a distinction)
– 24 oz cream cheese, at room temperature (that is key for {smooth} mixing)
– 1 cup granulated sugar
– 3 giant eggs, at room temperature (chilly eggs could make your batter lumpy)
– 1 cup bitter cream
– 8 oz semi-sweet chocolate, melted and barely cooled
– 2 tbsp prompt espresso powder (I exploit the high quality stuff that dissolves simply)
– 1 tsp vanilla extract
– 1/4 tsp salt
Instructions
1. Preheat your oven to 325°F and grease a 9-inch springform pan.
2. Mix graham cracker crumbs with melted butter till the feel resembles moist sand.
3. Press the crust combination firmly into the underside of your ready pan utilizing the underside of a measuring cup.
4. Bake the crust for 10 minutes at 325°F till calmly golden, then let it cool fully.
5. Beat room temperature cream cheese with sugar on medium pace for 3 minutes till fully {smooth}.
6. Add eggs one after the other, mixing simply till every egg disappears into the batter.
7. Blend in bitter cream, melted chocolate, espresso powder, vanilla, and salt till absolutely included.
8. Pour the filling over your cooled crust and {smooth} the highest with a spatula.
9. Place the springform pan in a bigger baking dish and create a water tub by pouring scorching water into the outer dish till it reaches midway up the edges of your springform pan.
10. Bake at 325°F for 60-70 minutes till the sides are set however the middle nonetheless jiggles barely whenever you gently shake the pan.
11. Turn off the oven, crack the door open, and let the cheesecake cool inside for 1 hour to stop cracking.
12. Remove from oven and run a knife across the edge to loosen it from the pan.
13. Refrigerate for not less than 6 hours, although in a single day is even higher for that excellent firm texture.
My favourite factor about this cheesecake is how the espresso cuts via the richness of the chocolate with out being overpowering. The texture is extremely {smooth} and creamy – it virtually melts in your mouth. Try serving skinny slices with a dusting of cocoa powder and a few contemporary berries for the final word dessert expertise.
Salted Caramel Chocolate Cheesecake

Heads up, this salted caramel chocolate cheesecake is about to grow to be your new favourite dessert. You get that excellent mixture of wealthy chocolate, creamy cheesecake, and that sweet-salty caramel swirl that simply hits totally different. Trust me, it’s price each minute.
Ingredients
- 2 cups graham cracker crumbs (I just like the honey form for further taste)
- 1/2 cup unsalted butter, melted (go for the actual stuff, it makes a distinction)
- 24 oz cream cheese, at room temperature (that is key for a {smooth} filling)
- 1 cup granulated sugar
- 3 giant eggs, at room temperature (they incorporate higher when not chilly)
- 1 cup semi-sweet chocolate chips, melted
- 1 tsp vanilla extract (pure vanilla offers the very best taste)
- 1/2 cup salted caramel sauce (I exploit store-bought to save time, however home made works too)
Instructions
- Preheat your oven to 325°F and grease a 9-inch springform pan.
- Mix graham cracker crumbs with melted butter till the feel resembles moist sand.
- Press the crumb combination firmly into the underside of the ready pan utilizing a flat-bottomed cup.
- Bake the crust for 10 minutes at 325°F till calmly golden, then let it cool fully.
- Beat room temperature cream cheese with sugar on medium pace for 3 minutes till fully {smooth}.
- Add eggs one after the other, mixing simply till every egg disappears into the batter.
- Stir in melted chocolate and vanilla extract till absolutely included.
- Pour half of the cheesecake batter over the cooled crust.
- Drizzle 1/4 cup of salted caramel sauce over the primary layer of batter.
- Top with remaining cheesecake batter and {smooth} the floor with a spatula.
- Create a water tub by putting the springform pan in a bigger roasting pan and pouring scorching water round it till it reaches midway up the edges.
- Bake at 325°F for 60-70 minutes till the sides are set however the middle nonetheless jiggles barely.
- Turn off the oven and crack the door open, letting the cheesecake cool inside for 1 hour to stop cracking.
- Chill the cheesecake within the fridge for not less than 6 hours, ideally in a single day.
- Drizzle remaining salted caramel sauce over the chilled cheesecake earlier than serving.
Look at that beautiful marbled prime and creamy texture that simply melts in your mouth. The chocolate and caramel create this unimaginable sweet-salty dance that’s pure magic. Try serving skinny slices with a sprinkle of sea salt flakes for that further wow issue.
Mint Chocolate Chip Cheesecake

Perfect for whenever you need one thing spectacular however not fussy, this mint chocolate chip cheesecake combines cool, creamy filling with wealthy chocolate chunks. You get that nostalgic ice cream taste in a decadent dessert that’s surprisingly easy to make. Trust me, it’s a crowd-pleaser each single time.
Ingredients
- 1 ½ cups chocolate wafer crumbs (I like those from Nabisco for that deep chocolate taste)
- 6 tbsp unsalted butter, melted (go for the good things—it makes the crust further wealthy)
- 24 oz cream cheese, at room temperature (that is key for a {smooth}, lump-free filling)
- 1 cup granulated sugar
- 1 cup bitter cream (full-fat offers you the creamiest texture)
- 3 giant eggs, at room temperature (they mix in so a lot better this fashion)
- 1 tsp peppermint extract (pure extract, not imitation, for the very best taste)
- ½ tsp vanilla extract
- Green food coloring, only a few drops (I exploit gel for vibrant colour with out thinning the batter)
- 1 cup mini chocolate chips (mini ones distribute completely in each slice)
Instructions
- Preheat your oven to 325°F and wrap the surface of a 9-inch springform pan tightly with aluminum foil to stop water seepage throughout baking.
- Mix the chocolate wafer crumbs with melted butter till the combination resembles moist sand and presses collectively simply.
- Press the crumb combination firmly into the underside of the ready pan utilizing the underside of a measuring cup for a fair layer.
- Bake the crust for 10 minutes at 325°F till it’s barely firm to the contact, then let it cool fully on a wire rack.
- Beat the room temperature cream cheese with granulated sugar on medium pace for 3 minutes till fully {smooth} and no lumps stay.
- Scrape down the edges of the bowl with a spatula, then beat within the bitter cream for 1 minute till absolutely included.
- Add eggs one after the other, beating for simply 30 seconds after every addition till mixed—overmixing incorporates an excessive amount of air.
- Mix in peppermint extract, vanilla extract, and inexperienced food coloring till the batter is uniformly tinted and {smooth}.
- Gently fold in mini chocolate chips with a spatula till evenly distributed all through the batter.
- Pour the filling over the cooled crust and {smooth} the highest with an offset spatula.
- Place the springform pan into a bigger roasting pan and pour scorching water into the roasting pan till it reaches midway up the edges of the springform pan.
- Bake at 325°F for 60-70 minutes till the sides are set however the middle nonetheless jiggles barely when gently shaken.
- Turn off the oven, crack the door open with a wood spoon, and let the cheesecake cool within the oven for 1 hour to stop cracking.
- Remove from the oven, run a knife across the edge to loosen, and refrigerate for not less than 6 hours or in a single day till fully chilled and firm.
Decadently creamy with a refreshing mint kick, this cheesecake slices superbly when chilly. The chocolate chips add little bursts of richness that distinction completely with the cool filling. Serve it with a drizzle of chocolate sauce or a dollop of whipped cream for an additional particular deal with.
Chocolate Hazelnut Cheesecake

Perfect for whenever you’re craving one thing wealthy and indulgent, this chocolate hazelnut cheesecake combines creamy filling with a nutty crunch. You’ll love how the flavors soften collectively in each chunk. It’s surprisingly easy to make for such a powerful dessert.
Ingredients
– 2 cups chocolate wafer crumbs (I like those with a touch of vanilla)
– 1/2 cup melted butter (salted offers the crust good distinction)
– 24 oz cream cheese, room temperature (that is key for {smooth} mixing)
– 1 cup granulated sugar
– 3 giant eggs, room temperature (they incorporate higher when not chilly)
– 1 cup chocolate hazelnut unfold (go for the good things—it makes all of the distinction)
– 1 tsp vanilla extract
– 1 cup heavy cream
– 1/2 cup chopped hazelnuts, toasted (toasting brings out their wonderful taste)
Instructions
1. Preheat your oven to 325°F.
2. Combine chocolate wafer crumbs and melted butter in a medium bowl till the combination resembles moist sand.
3. Press the crumb combination firmly into the underside of a 9-inch springform pan.
4. Bake the crust for 10 minutes at 325°F till calmly set.
5. Remove the crust from the oven and let it cool fully on a wire rack.
6. Reduce oven temperature to 300°F.
7. Beat room temperature cream cheese and granulated sugar in a big bowl with an electrical mixer on medium pace for 3 minutes till {smooth} and creamy.
8. Add eggs one after the other, beating for 30 seconds after every addition till absolutely included.
9. Mix in chocolate hazelnut unfold and vanilla extract till the batter is uniform in colour.
10. Pour in heavy cream and beat on low pace simply till mixed, about 1 minute.
11. Pour the filling over the cooled crust and {smooth} the highest with a spatula.
12. Sprinkle toasted chopped hazelnuts evenly excessive of the cheesecake.
13. Place the springform pan in a bigger baking dish and create a water tub by pouring scorching water into the bigger dish till it reaches midway up the edges of the springform pan.
14. Bake at 300°F for 60-70 minutes till the sides are set however the middle nonetheless jiggles barely when gently shaken.
15. Turn off the oven and prop the door open with a wood spoon, letting the cheesecake cool within the oven for 1 hour.
16. Remove from the oven and run a knife across the fringe of the pan to stop cracking.
17. Refrigerate the cheesecake for not less than 6 hours, or ideally in a single day, earlier than serving.
Velvety {smooth} with that excellent creamy texture, this cheesecake delivers deep chocolate taste balanced by the toasted hazelnut crunch. Try serving skinny slices with a drizzle of additional chocolate hazelnut unfold warmed barely—it takes the indulgence to one other stage. The distinction between the wealthy filling and crisp crust makes each chunk completely irresistible.
Cookies and Cream Chocolate Cheesecake

Picture this: you’re craving one thing decadent however don’t need to spend hours within the kitchen. This cookies and cream chocolate cheesecake hits that candy spot completely—it’s wealthy, creamy, and full of nostalgic cookie crunch.
Ingredients
- 1 ½ cups chocolate cookie crumbs (I all the time use Oreo crumbs with the filling included for further taste)
- 6 tbsp melted butter (salted butter offers the crust a pleasant steadiness)
- 24 oz cream cheese, softened to room temperature (that is essential for a {smooth}, lump-free filling)
- ¾ cup granulated sugar
- 3 giant eggs at room temperature (they incorporate a lot better when not chilly)
- 1 cup semi-sweet chocolate chips, melted and barely cooled
- 1 cup heavy whipping cream
- 1 tsp vanilla extract
- 12 Oreo cookies, roughly chopped (reserve just a few items for topping)
Instructions
- Preheat your oven to 325°F and grease a 9-inch springform pan.
- Combine chocolate cookie crumbs and melted butter in a medium bowl till the combination resembles moist sand.
- Press the crumb combination firmly into the underside of the ready pan utilizing the underside of a measuring cup to create a fair layer.
- Bake the crust for 10 minutes at 325°F till calmly set, then let it cool fully on a wire rack.
- In a big bowl, beat the softened cream cheese with an electrical mixer on medium pace for two minutes till {smooth} and creamy.
- Gradually add sugar whereas persevering with to beat for one more 2 minutes till absolutely included.
- Add eggs one after the other, beating for 30 seconds after every addition till simply mixed—don’t overmix.
- Pour in melted chocolate, heavy cream, and vanilla extract, then combine on low pace till the batter is uniform in colour.
- Gently fold within the chopped Oreo cookies with a spatula, being cautious not to overmix.
- Pour the filling over the cooled crust and {smooth} the highest with an offset spatula.
- Bake at 325°F for 55-60 minutes till the sides are set however the middle nonetheless jiggles barely when shaken.
- Turn off the oven, crack the door open, and let the cheesecake cool inside for 1 hour to stop cracking.
- Transfer the cheesecake to a wire rack to cool fully to room temperature, about 2 hours.
- Refrigerate for not less than 6 hours, or ideally in a single day, earlier than serving.
What you get is that this unimaginable distinction between the velvety chocolate cheesecake and people crunchy cookie bits all through. The Oreo items keep surprisingly crisp in opposition to the sleek filling, making every chunk texturally thrilling. Try serving chilled slices with further crushed cookies on prime or a drizzle of chocolate sauce for that further wow issue.
White Chocolate Raspberry Cheesecake

Ever end up craving one thing that feels each decadent and a bit of bit fancy? You’re in luck—this white chocolate raspberry cheesecake is the final word deal with for whenever you need to impress with out the stress. It’s creamy, fruity, and completely definitely worth the effort.
Ingredients
- 1 ½ cups graham cracker crumbs (I like utilizing honey grahams for a contact of sweetness)
- ⅓ cup unsalted butter, melted (go for the good things—it makes the crust further wealthy)
- 24 oz cream cheese, softened to room temp (that is key for a {smooth}, lump-free filling)
- 1 cup granulated sugar
- 3 giant eggs, at room temp (belief me, chilly eggs could make the batter curdle)
- 1 tsp vanilla extract (pure vanilla offers the very best taste)
- 8 oz white chocolate, melted and barely cooled (I exploit baking bars, not chips, for smoother melting)
- 1 cup contemporary raspberries (frozen work too, however pat them dry if utilizing)
Instructions
- Preheat your oven to 325°F and grease a 9-inch springform pan.
- Mix the graham cracker crumbs and melted butter in a bowl till the crumbs are evenly coated.
- Press the crumb combination firmly into the underside of the ready pan, utilizing the again of a spoon to create a fair layer.
- Bake the crust for 10 minutes at 325°F, then take away it from the oven and let it cool fully.
- Beat the softened cream cheese and sugar collectively in a big bowl on medium pace for 2-3 minutes till {smooth} and creamy.
- Add the eggs one after the other, mixing on low pace simply till every egg is included—overmixing may cause cracks.
- Stir within the vanilla extract and melted white chocolate till absolutely mixed.
- Gently fold within the raspberries with a spatula to keep away from crushing them an excessive amount of.
- Pour the filling over the cooled crust and unfold it evenly with a spatula.
- Place the springform pan into a bigger baking dish and fill the outer dish with 1 inch of scorching water to create a water tub—this helps stop cracks.
- Bake the cheesecake at 325°F for 55-65 minutes, till the sides are set however the middle nonetheless jiggles barely when nudged.
- Turn off the oven, crack the door open, and let the cheesecake cool inside for 1 hour to keep away from sudden temperature modifications.
- Refrigerate the cheesecake for not less than 4 hours, or in a single day for the very best texture.
Keep in thoughts that the creamy white chocolate pairs completely with the tart raspberries, giving every chunk a stunning steadiness. For a flowery contact, garnish with further contemporary raspberries and a drizzle of melted white chocolate proper earlier than serving.
Chocolate Peanut Butter Cheesecake

Oh my goodness, are you prepared for essentially the most decadent dessert? This chocolate peanut butter cheesecake combines two basic flavors into one creamy, dreamy deal with that’s surprisingly easy to make. You’re going to love how the wealthy chocolate and nutty peanut butter come collectively in each single chunk.
Ingredients
- 1 ½ cups chocolate graham cracker crumbs (I like the additional chocolatey ones for a deeper taste)
- ¼ cup granulated sugar
- 6 tbsp melted unsalted butter (use the actual stuff—it makes the crust further crispy)
- 24 oz cream cheese, at room temperature (that is key for a {smooth}, lump-free filling)
- 1 cup creamy peanut butter (I all the time go together with the pure form, however any works)
- 1 cup granulated sugar
- 3 giant eggs, at room temperature (they mix a lot better when not chilly)
- 1 tsp vanilla extract
- ½ cup semi-sweet chocolate chips, melted (microwave in 30-second bursts to keep away from burning)
- ½ cup heavy cream
Instructions
- Preheat your oven to 325°F.
- Combine the chocolate graham cracker crumbs, ¼ cup sugar, and melted butter in a medium bowl till the combination resembles moist sand.
- Press the crumb combination firmly into the underside of a 9-inch springform pan utilizing the underside of a measuring cup to create a fair layer.
- Bake the crust for 10 minutes at 325°F till it’s barely firm to the contact.
- Remove the crust from the oven and let it cool fully on a wire rack.
- Reduce the oven temperature to 300°F.
- Beat the room temperature cream cheese and 1 cup sugar in a big bowl with an electrical mixer on medium pace for two minutes till {smooth} and creamy.
- Add the peanut butter and vanilla extract, then beat for one more 1 minute till absolutely included.
- Add the room temperature eggs one after the other, beating for 20 seconds after every addition simply till mixed—don’t overmix.
- Pour half of the cheesecake batter into the cooled crust.
- Stir the melted chocolate into the remaining batter till no streaks stay.
- Pour the chocolate batter over the peanut butter layer within the pan.
- Use a knife to gently swirl the 2 batters collectively 4-5 instances for a marbled impact.
- Place the springform pan into a bigger baking dish and thoroughly pour scorching water into the bigger dish till it reaches midway up the edges of the springform pan.
- Bake the cheesecake at 300°F for 60-70 minutes till the sides are set however the middle nonetheless jiggles barely when shaken.
- Turn off the oven, crack the door open 1 inch, and let the cheesecake cool within the oven for 1 hour.
- Remove the cheesecake from the water tub and run a knife across the edges to loosen it from the pan.
- Refrigerate the cheesecake for not less than 6 hours, or ideally in a single day.
- Whip the heavy cream with an electrical mixer on high pace for 2-3 minutes till stiff peaks type.
- Spread the whipped cream over the chilled cheesecake earlier than serving.
Zesty as that sounds, this cheesecake is something however—it’s extremely creamy with an ideal marbled texture that slices superbly. The chocolate and peanut butter layers create this excellent distinction the place every chunk is each wealthy and barely nutty. Try serving it with a drizzle of melted peanut butter and chocolate shavings for an additional particular presentation that’ll have everybody asking for seconds.
Chocolate Mocha Cheesecake

Diving into this chocolate mocha cheesecake looks like wrapping your self in a heat, caffeinated hug. You get that wealthy chocolate depth paired with simply sufficient espresso kick to make each chunk thrilling. It’s the proper dessert for when you possibly can’t resolve between dessert and your afternoon pick-me-up.
Ingredients
– 2 cups chocolate graham cracker crumbs (I really like the additional chocolatey ones)
– 1/2 cup melted unsalted butter (this helps the crust maintain collectively completely)
– 24 oz cream cheese, at room temperature (significantly, room temp makes all of the distinction)
– 1 cup granulated sugar
– 3 giant eggs, at room temperature (chilly eggs could make the batter curdle)
– 1 cup bitter cream
– 8 oz semi-sweet chocolate, melted and cooled
– 2 tbsp prompt espresso powder (I exploit the high quality powder that dissolves fully)
– 1 tsp vanilla extract
– 1/4 tsp salt
Instructions
1. Preheat your oven to 325°F and grease a 9-inch springform pan.
2. Mix chocolate graham cracker crumbs with melted butter till the feel resembles moist sand.
3. Press the crumb combination firmly into the underside of the ready pan utilizing the underside of a measuring cup.
4. Bake the crust for 10 minutes at 325°F till calmly aromatic.
5. Beat room temperature cream cheese with granulated sugar on medium pace for 3 minutes till fully {smooth}.
6. Add room temperature eggs one after the other, mixing simply till included after every addition.
7. Mix in bitter cream, melted chocolate, prompt espresso powder, vanilla extract, and salt till absolutely mixed.
8. Pour the filling over the baked crust and {smooth} the highest with a spatula.
9. Place the springform pan in a bigger baking dish and create a water tub by pouring scorching water into the bigger dish till it reaches midway up the edges of the springform pan.
10. Bake at 325°F for 60-70 minutes till the sides are set however the middle nonetheless jiggles barely.
11. Turn off the oven and crack the door open, letting the cheesecake cool steadily inside for 1 hour.
12. Remove from oven and run a knife across the edge to stop cracking because it cools.
13. Refrigerate for not less than 6 hours, although in a single day is even higher for the proper texture.
Nothing beats slicing into this magnificence after it’s absolutely chilled. The espresso powder offers it that subtle espresso taste with out being bitter, whereas the chocolate makes it really feel indulgent but balanced. Try serving skinny slices with a dollop of whipped cream and chocolate shavings for that further wow issue.
Chocolate Cherry Cheesecake

Tired of the identical previous desserts? This chocolate cherry cheesecake is about to grow to be your new favourite. You get wealthy chocolate, candy cherries, and that creamy cheesecake texture all of us love—it’s a complete crowd-pleaser with out being overly difficult.
Ingredients
– 1 ½ cups graham cracker crumbs (I like to crush mine contemporary for further crunch)
– ½ cup unsalted butter, melted (go for the good things—it makes a distinction)
– 24 oz cream cheese, at room temperature (this helps keep away from lumps, belief me)
– ¾ cup granulated sugar
– 3 giant eggs, at room temperature (they mix smoother when not chilly)
– 1 tsp vanilla extract (pure vanilla offers the very best taste)
– ½ cup bitter cream (full-fat for that ultra-creamy texture)
– 1 cup semi-sweet chocolate chips, melted (I microwave in 30-second bursts to stop burning)
– 1 can cherry pie filling (search for one with plump cherries—it’s price it)
Instructions
1. Preheat your oven to 325°F.
2. Combine graham cracker crumbs and melted butter in a medium bowl till the combination resembles moist sand.
3. Press the crumb combination firmly into the underside of a 9-inch springform pan utilizing the underside of a glass.
4. Bake the crust for 10 minutes at 325°F till calmly golden.
5. Remove the crust from the oven and let it cool fully on a wire rack.
6. Beat room temperature cream cheese and sugar collectively in a big bowl on medium pace for two minutes till {smooth} and creamy.
7. Add eggs one after the other, mixing simply till every egg is included to keep away from overbeating.
8. Mix in vanilla extract and bitter cream till absolutely mixed.
9. Gently fold within the melted chocolate till no white streaks stay.
10. Pour the cheesecake filling over the cooled crust and unfold evenly with a spatula.
11. Place the springform pan on a baking sheet and bake at 325°F for 45-50 minutes till the sides are set however the middle nonetheless jiggles barely.
12. Turn off the oven, crack the door open, and let the cheesecake cool inside for 1 hour to stop cracking.
13. Remove from oven and run a knife across the fringe of the pan to loosen the cheesecake.
14. Refrigerate for not less than 4 hours, or ideally in a single day, till fully chilled and firm.
15. Spoon cherry pie filling excessive simply earlier than serving.
What makes this dessert particular is how the creamy chocolate filling contrasts with the tart cherry topping. The graham cracker crust provides simply sufficient crunch to steadiness the sleek texture. Try serving slices with a drizzle of melted chocolate or a scoop of vanilla ice cream for an extra-indulgent deal with.
Vegan Dark Chocolate Cheesecake

Sometimes you simply want a wealthy, decadent dessert that occurs to be vegan. This darkish chocolate cheesecake is so creamy and indulgent, you gained’t consider it’s dairy-free. It’s excellent for impressing company or treating your self after a protracted day.
Ingredients
– 2 cups uncooked cashews (soaked in a single day for optimum creaminess)
– 1/2 cup coconut oil (I want refined for much less coconut taste)
– 1/2 cup maple syrup (the actual stuff makes all of the distinction)
– 1/2 cup cocoa powder (use high-quality darkish for intense taste)
– 1/4 cup almond milk (unsweetened works finest right here)
– 1 tsp vanilla extract (pure vanilla actually shines via)
– 1/4 tsp salt (only a pinch to steadiness the sweetness)
– 1 1/2 cups graham cracker crumbs (about 12 full sheets crushed)
– 6 tbsp melted vegan butter (this helps the crust maintain collectively completely)
Instructions
1. Soak 2 cups uncooked cashews in water for not less than 4 hours or in a single day.
2. Drain the soaked cashews fully utilizing a colander.
3. Preheat your oven to 350°F.
4. Crush 12 graham cracker sheets into high quality crumbs utilizing a food processor or rolling pin.
5. Combine graham cracker crumbs with 6 tablespoons melted vegan butter in a medium bowl.
6. Press the crumb combination firmly into the underside of a 9-inch springform pan.
7. Bake the crust for 8 minutes at 350°F till calmly golden.
8. Let the crust cool fully on a wire rack.
9. Blend the drained cashews in a high-speed blender till fully {smooth}.
10. Add 1/2 cup coconut oil, 1/2 cup maple syrup, 1/2 cup cocoa powder, 1/4 cup almond milk, 1 teaspoon vanilla extract, and 1/4 teaspoon salt to the blender.
11. Blend all elements for 2-3 minutes till the combination is completely {smooth} and creamy.
12. Pour the filling over the cooled crust and {smooth} the highest with a spatula.
13. Tap the pan gently on the counter to take away any air bubbles.
14. Freeze the cheesecake for not less than 6 hours or till fully firm.
15. Let the cheesecake thaw at room temperature for 20 minutes earlier than serving.
You’ll love how this cheesecake slices cleanly when chilled however melts luxuriously in your mouth. The darkish chocolate taste is intense but balanced by the delicate sweetness. Try topping it with contemporary berries or a drizzle of melted chocolate for an additional particular presentation.
Chocolate Cheesecake Brownie Bites

You know these days whenever you need one thing decadent however don’t need to commit to an entire cake? Yeah, me too. That’s why these chocolate cheesecake brownie bites are my go-to—they’re wealthy, fudgy, and ideal for sharing (or not!).
Ingredients
– 1 cup all-purpose flour (I like to spoon and stage it for accuracy)
– ¾ cup granulated sugar (I generally swap half with brown sugar for further moisture)
– ½ cup unsalted butter, melted (cooled barely so it doesn’t prepare dinner the eggs)
– 2 giant eggs, at room temperature (they mix into the batter extra easily)
– ¼ cup cocoa powder (use Dutch-processed for a deeper chocolate taste)
– 8 oz cream cheese, softened (go away it on the counter for Half-hour—it mixes higher)
– ¼ cup powdered sugar (sift it to keep away from lumps within the cheesecake layer)
– 1 tsp vanilla extract (pure vanilla makes a noticeable distinction right here)
– ½ tsp baking powder
– ¼ tsp salt
Instructions
1. Preheat your oven to 350°F and line a 9×9-inch baking pan with parchment paper, letting the sides cling over for simple elimination.
2. In a medium bowl, whisk collectively the flour, cocoa powder, baking powder, and salt till no streaks stay.
3. In a separate giant bowl, mix the melted butter and granulated sugar, stirring for about 1 minute till {smooth}.
4. Add the eggs one after the other to the butter combination, mixing absolutely after every addition to emulsify the batter.
5. Stir within the vanilla extract till simply included.
6. Gradually fold the dry elements into the moist combination utilizing a spatula, mixing till the brownie batter is uniform and no flour pockets stay.
7. In one other bowl, beat the softened cream cheese with an electrical mixer on medium pace for 1 minute till creamy.
8. Add the powdered sugar to the cream cheese and beat for two extra minutes till fluffy and {smooth}.
9. Spread about two-thirds of the brownie batter evenly into the ready pan utilizing an offset spatula.
10. Drop spoonfuls of the cream cheese combination over the brownie layer, spacing them about 1 inch aside.
11. Dollop the remaining brownie batter between the cream cheese mounds, then gently swirl the layers with a knife to create a marbled impact.
12. Bake for 25–Half-hour, or till the sides are set and a toothpick inserted right into a brownie part comes out with just a few moist crumbs.
13. Cool the pan on a wire rack for 1 hour to let the bites firm up earlier than slicing.
14. Use the parchment paper to carry the slab out of the pan, then minimize into 1-inch squares with a pointy knife.
Just out of the oven, these bites are pure magic—the brownie stays fudgy and dense, whereas the cheesecake swirl provides a tangy creaminess that balances the chocolate. I really like serving them barely heat with a dusting of cocoa powder or alongside a scoop of vanilla ice cream for an extra-indulgent deal with.
Conclusion
Craving one thing candy? This assortment of 33 decadent chocolate cheesecake recipes gives infinite inspiration for each event. We hope you discover a new favourite to whip up and luxuriate in! Don’t neglect to go away a remark telling us which recipe you liked most and share this roundup on Pinterest so different dessert lovers can indulge too.


Discussion about this post